Friday, March 29, 2013

Printer Vomit And How To Look Classy In Today's Slutty Fashion


I'm sorry I haven't posted in a while. I am launching my new store on Etsy, Knot What She Seams, this Saturday and I am super busy. Saturday happens to be the second to the last day of the month....I would have done March 31st, but it's Easter. I would have done April 1st, but I didn't want my store to be associated with the idle cares of April Fools day. (For those abroad, this another stupid United States holiday that has no merit or meaning....kindly disregard!). I also couldn't open on April 2nd or 3rd, as my older (minor) child has state exams in school. Ugh. I see many psychotic episodes in my near future (stress worsens his Bipolar II disorder).
Thus, March 31st is the holy grail of a day to commence my store opening.....and now you are none the wiser in my nonsensical ramblings and can further understand why my family hardly ever contacts me. ;P

In the midst of becoming a new grandmother for the very first time (is that a double positive or improper English?!).....UGH!....I am finding myself also busy with selling the remaining stock of my last Etsy shop, Far Out Sprouts (who knew closing a store would make sales jump through the roof?!). If any of this matters to you, by the way, you can kindly become a new fan of my Facebook page. Warning: I have a weird family too....and even though I hardly ever use Facebook for personal means, that's the only way my family cares to communicate with each other. Maybe this is why I am hardly ever on Facebook! (all of my store updates, blog stuff,etc is automatically updated to Facebook so I don't have to mess with any of it....or see the new tattoo my ex boyfriend has, or see the new body piercing my 14 yr old has, or the guy my 15 yr old beat up and was suspended from school from....or the uber marijuana joint one of my kids smoked last night...or the new horse and buggy my Mennonite sister got yesterday from a religious-dorks-flea-market bonanza......you get the picture!

I am uber-stoked about my new store and hope it is as successful as my last. I think it will be because I am now selling FAMILY apparel, not just kiddie stuff. I am also selling my home decor my baby sister (who has a Mercedes model horse and buggy from  the Yuppie-Mennonite-Are-Us store) strongly encouraged me to sell. Ok, let's see if this works. The last time I took my yuppie Mennonite sister's advice, I married a guy I met online who used me as a baby machine AND turned out to be a cross dressing homosexual....so I am always leery now to take anyone's advice!

I also have been buying and/or downloading fabulous sewing patterns like a mad woman lately in hopes I can further my sewing techniques coupled with this sewing machine that does everything except clean my house and make coffee. What a tragedy it would be if I didn't use all of it's bells and whistles!!!

That leads me to my primary reason for writing today....hope you haven't gone into a coma yet or clicked off this page yet..... :/

My printer is awesome. It's almost as awesome as some of the clothes I have made for myself lately. But it has a plug...and that means I can ruin it or break it or it can self implode. I get a lot of printer vomit here and there. My husband isn't so happy about it either....after all, the real kind of vomit sends him to his car so he won't instantly vomit himself (I'm glad he didn't use me as a baby machine because that's all babies do....vomit and poop!).

Enjoy, for your viewing pleasure, what I'm talking about below. This is printer vomit. It's of this FANTASTIC pattern I bought from ikatbag.....here's the link of her patterns. Not only does she have the best patterns ever, and quite worth the price, but she answers her email at stupid times of the night and doesn't laugh at you for your outrageous mistakes (my computer decided to have early onset dementia and "ate" the pattern link for the PDF file I purchased from her). At least I don't think she laughed at me.....

Here is the pattern I got (OMG, I can't wait to get the fabric for it!!!!!!!)....
...and here is what my printer did to her pattern...... :O
look closely....closer, yes, that's like 5 copies of EACH PAGE PATTERN!

....and more on the floor because not all FIVE COPIES of each page fit on the queen size bed!
BTW, the floor is gray, not poop brown....I swear!
As Dana Carvey would say, "Ain't That Special?". (OMG. Dana Carvey is like a funny version of my my middle sister, the Mennonite OG--Original Gansta--,and my mom!!!).

I am still trying to figure out (beyond the obvious) why I have printer vomit a lot.....my printer needs an excoriation?????

Onto my second reason for posting today....if you are still with me and able to follow my train of thoughts....which regularly derail and stop to refuel......:P

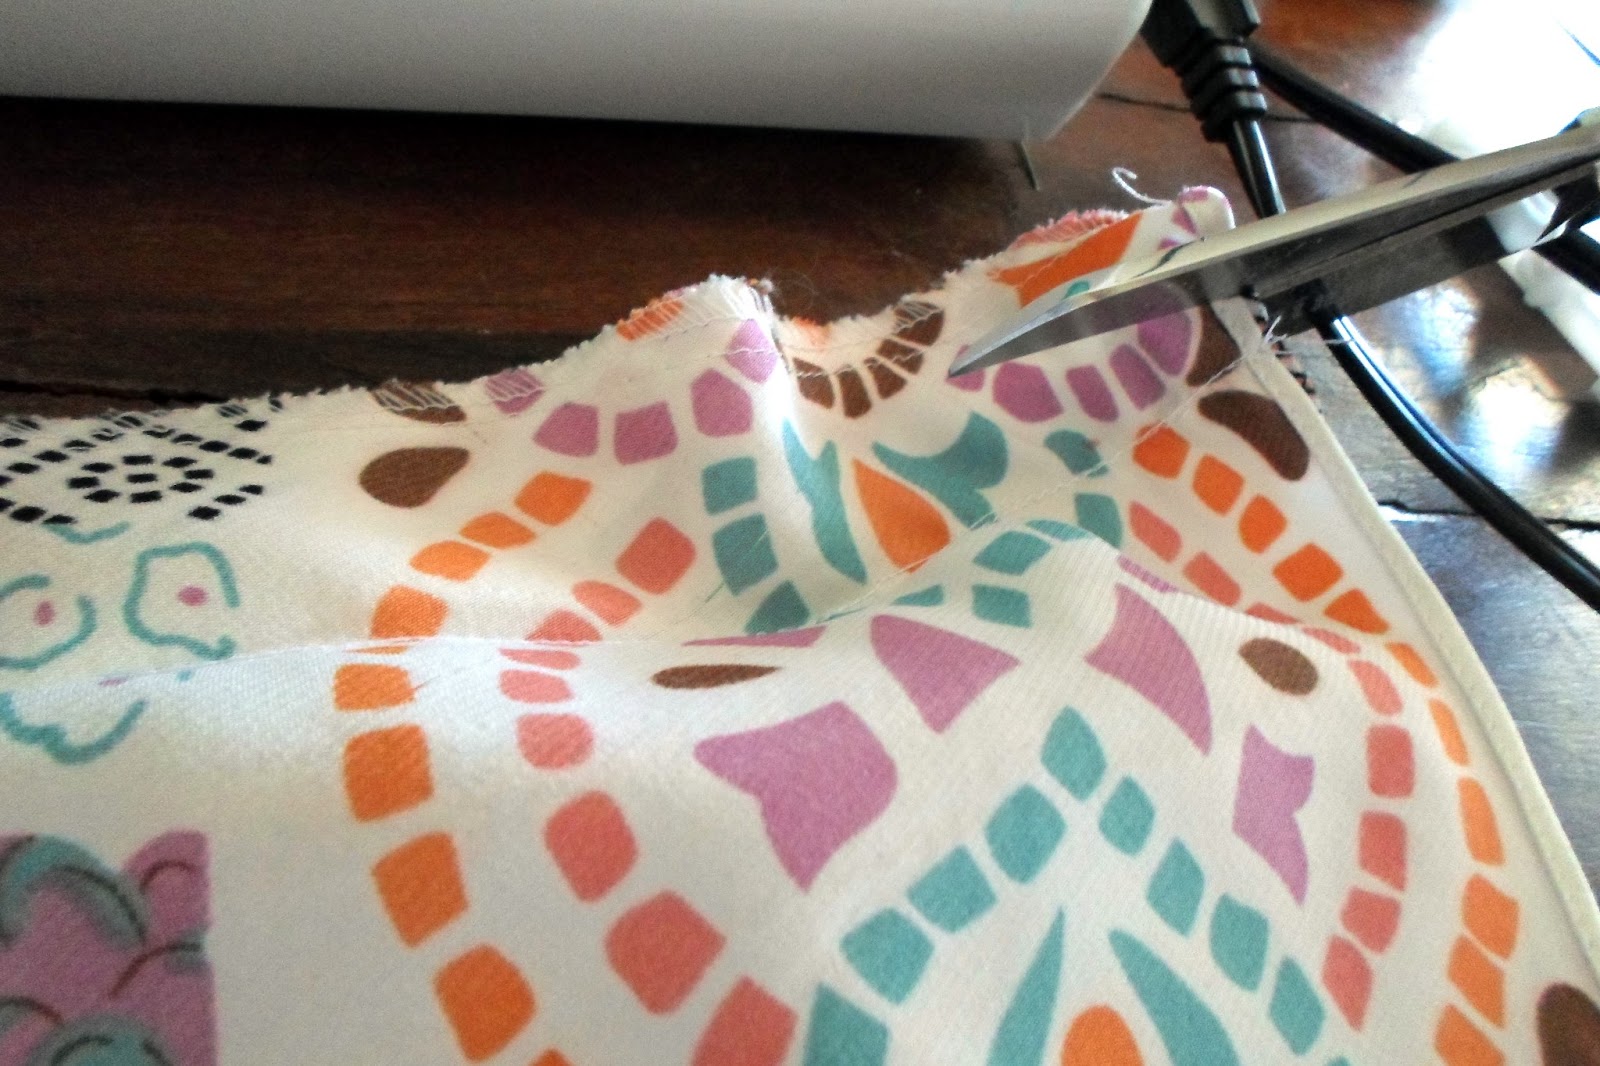
Today's fashion. WOW. I'm not going to harp on it like the Wednesday night Bible study lady at my church does with everything on this planet. Let's just say that lady is like an abstinent version of my sisters and mom.  This lady really, REALLY needs to get laid and take a chill pill......but I digress. I love sexy clothes, looking hot, and fortunately because of my mom, I still possess these fine traits even as a grandmother who is almost 40 years old. But come on people.....I am not going to expose myself even if my new hubby does like me wearing revealing clothes....even outside the house. So what does one do if they are a novice sewer like me, or worse, doesn't sew at all, and don't belong to a nudist camp?! You buy the slutty clothes on the retail rack, go home, chop up the outfit, and hope it actually looks good and fits. That's what I did to the number below.....
the shirt is hanging well below the table because it was rather long

Meet Ms. Swimsuit Coverup. As a coverup, she posses more fabric than the average slutty ensemble on the market today. I love the fabric too. You can't get enough polka dotted knit and if I were to buy it from the fabric store, I wouldn't get this much of it for $9. Polka dots are so hot right now, the fabric stores are having a hard time keeping it in stock and it's pricey too....at least in my secluded corner of the earth!

But Ms. Coverup has a downside....she has NO chest covering. I mean, it's as if this coverup only covers you lower torso and your butt. Hmmmmmm, I need some chest coverage here no matter what look I am going for and for whatever reason i am using the outfit!!!! And folks, I must be the milkman's daughter because unlike everyone in my family on BOTH sides, I am flat chested. So if your slutty outfits you are selling doesn't cover my speed bumps, you need to seriously reconsider the clothing you're selling!!!!

I took the coverup and tried it on...without children present so they wouldn't vomit (here we are talking about vomit again!). I discerned where the shirt will end at my hips and chopped off the bottom. This gave me PLENTY of fabric to play with....like half a yard!
the slutty mu-mu is now shopped in half nearly with the bottom  half gone....

I recreated or copied the top band that had pretty ruffles...the main reason why I loved this shirt. I just took my chest measurement, compared the shirt's measurement in the chest, and made more of that ruffled band to cover up my chest. The ruffled band, by the way, fit in the width, but NOT the length. So, I had to ADD fabric to the top of the shirt so what little I have doesn't fall out and greet people. Seriously, it was waaaay more than just cleavage!

Again, I am just copying the ruffled band and adding the copied panel to the top of the shirt so it appears as if the shirt was made with a longer bodice/breast panel/chest part. It was simple because it is knit. I got ballpoint needles for my sewing machine, threw on that gathering presser foot (or ruffler foot if you are fortunate to have one), and gathered along the fabric. I placed the gather fabric onto a flat, non-gathered panel in horizontal rows...I think I had like 3 or 4 rows. Above you see the original chest/bodice band with black elastic thread running horizontally. I didn't have that color elastic thread (where do you buy it??) so I used my white elastic thread...as you see it towards the top. From the front you will not notice. It all looks the same. You can't see where my added panel starts and ends!

I tried on the less slutty mu-mu that is not really a mu-mu now that it hits my hips. It now kinda reminds me of  maternity sleep shirt the Kardashians would wear. :( I have their bodacious ass size, but not the money or the breasts. Time to go back to the sewing machine and shirr that waistline. Mr. Little HATES me wear anything maternity looking!
This was very simple. Again, hand winding the bobbin (keep the top thread normal thread!!!) with elastic thread, and marking the two or three rows of shirring I wanted right under my chest (empire waist), I just sewed right along those lines. With shirring, you must sew with the front (right side) of the fabric facing up, or looking at you while sewing. That way the elastic thread is under the fabric on the wrong side. This will be quite an unsightly project if you don't do this! My top thread was black so you can't see the thread....just the shirring effect. I also had my tension on 2 (I don't even know what it goes up to, but auto is normal sewing and 2 does the trick--and then some!) and the stitch length at 4.5. Normal stitch length for a straight stitch on my machine is 2.5. Again, with knits, you just don't have to work hard on getting it to ruffle. Often it likes to ruffle even when you don't want it to!

I tried on the shirt and admired my work. Sorry, the 10 yr old was NOT interested in taking pictures that day. I promise you it looks stinkin' FABULOUS! I'm so impressed with myself....I had gotten a disappearing fabric marker and marked where my tiny cleavage "crack" was and decided that was where the shirt would come up to. It actually worked! The shirt met the top of my cleavage PERFECTLY! And yet, I don't look like i am joining a convent either because the shirt is still rather low for many people's tastes.

The 10 yr old did help me pin my ruffled straps. I had leftover fabric and didn't like this shirt sleeveless. This is NOT a good idea if you are flat chested and have children young enough that they tug on your clothing and OOPS! Your cute little speed bumps fall out as the shirt is pulled down by your little one. :( (big sad face!).

These straps are more decorative than functional so I didn't mind them loose enough to fall down on my shoulders.

8 inch by 4 inch fabric strips that didn't need to be hemmed as it is knit.....here they are after ruffled with elastic thread (four rows of shirring short end to short end)....

what they looked like before shirring
The ten year old didn't have an issue pinning the straps to the shirt where my bra straps were. (of course, I will be wear a strapless bra with this shirt, but I wore the strapped one to help the kiddo know where to pin). The 10 yr old very much likes girls and has begun to show interest in all things females wear/use like bras. UGH. We are starting puberty early!

Anyways, that's how you make a slutty shirt classy and fabulous. You will see much better items in my new store. I promise I am carrying clothing for women that have real boobs, not speed bumps. I know I am a freak of nature and most women need clothing that fits curves. :D

Thanks for not passing out with the long post! 

Wednesday, March 20, 2013

Upcycling Old Shirts To Trendy Fabulous Blouses

I have lost at least 30 pounds due to my dental complications and surgeries. The excruciating pain, cost of having a dentist rip stuff out of your mouth, and the smell of abscesses building up one after another is just no fun.

Additionally, having everything in your closet and drawers not fit you whatsoever and not being able to buy a new wardrobe is aggravating. I do have a new sewing machine. Though I don't have any experience in making adult clothes, I figured this was a golden opportunity to learn how. Plus, if I screw up, it's not like I ruined someone else's clothes!

Here is one of the old blouses of mine....I love the material still but gosh it could fit an elephant. Was I really this big?!

I had erroneously believed the shirt was a peasant style blouse too....but when I took a closer look at the neckline, I realized that was not true. This meant it would be harder to take the extra inches out of it's neckline. (My plan was to yank some elastic out of the neckline...)
Taking out inches from the flat seam parts wasn't an option with my novice sewing skills! So I had to work with the gathered sleeves/neckline part and take out elastic from there. I ended up taking out two inches of elastic from each side. I carefully seam ripped out the casing beforehand and then inconspicuously sewed up the small section of ripped out seams afterwards. Turned out perfect. However, now the sleeves are VERY poofy! Oh well. Maybe this will become a new fashion trend. :P

I tried this elephant blouse on and got my pins out and pinned all the way down the sides to reflect how I wanted the blouse to eventually fit me. This wasn't an exact science. I had watched my mom, who is a professional tailor, do this a million times. However, I had no clue what I was doing! :D I didn't take a picture of this step because it was hard enough to pin a blouse to my own body much less take a picture of myself. You should have seen the odd looks my 4 year old was giving me too!


 The above three pictures reflect the side seams being pinned. I ended up taking up two inches from each side through the chest (right under the armpit) and one inch from each side at the bottom where the blouse hits my hips. I needed this blouse to still fit loosely so I can fit it over my head still and it drapes nicely still. I figured these measurements would give me an Aline blouse which is flattering on anyone. I'm not sure what the original blouse shape was suppose to be.....military tank? Bloated elephant? Obese person 3 days post-mortem (i.e post-mortem bloating)?! We will never know.

I ironed the shirt on the sides where my pins were. This gave a nice crisp crease all the way down. Then, I took the pins out. I then got the blouse inside out and observed those pretty creases as a guideline to where I need to sew my new side seams. I'm sure there's a better method of taking up the sides. However, I was taking in a shirt I had to alter on myself. That's not easy no matter what mad skills you possess.

As I was reflecting on how awesome and crafty I was, I realized that those poofy clown sleeves had an armpit two inches away from my new side seam. :( In case you are not following me, this meant I would have  a gap between the armpit and the new seam. I would need to close it up before I eventually cut off the access material I took in! Either that, I would need to sew a new side seam for the sleeves too. Ugh. The sleeves were already weird in my opinion. I didn't want to make them weirder with my lovely sewing skills.

I concocted an idea that I would just angle the old armpit to the new armpit and then sew down the sides of the blouse where that ironed crease was. man I'm brilliant. :P

The arrow is pointing to the ironed crease I am following after making an angled armpit. Ignore Mr.Pin. He's just there to make the slippery fabric not dance away from me. This is the type of fabric that likes to do the jitterbug....even with ballpoint needles. :(

Now I have sewed all the way down the blouse....neat,straight seam and the blouse is laying nice and flat. Yea! Time to cut the excess fabric off and then serge or overlock those seams. Even though this blouse will still fit loosely, i wanted to use a stretch stitch because I knew I would be moving a lot in it....i am a very active person with wild children. :P

WARNING: ugly pictures of me coming up next. Please take your elderly family and young children away from the computer screen. Some material may be offensive to some audience members. :P


So obviously it's nearly impossible to take a picture of yourself even with a mirror. I promise you the blouse looks awesome, symmetrical, and professional....I don't know how i pulled it off! But, I decided this blouse still needed something a bit more interesting. Plastic surgery wasn't in my cards :D so I went with black lace. You can NEVER go wrong with lace! And, fortunately for me, it's super popular right now!

I wound my bobbin with some elastic thread too and shirred just a small portion of the sides so now it has a slight upwards direction on each side and gives the appearance that my waist is even smaller. This is a great idea for anyone to do to their DIY fashion projects so they can instantly "lose" 5 pounds! Even if you shirr just one side, it gives visual interest and draws the eye away from your pudginess.

Next time I will show you what to do with one of a jillion slutty shirts that seem to be hitting the store racks lately and make it into something you can actually wear to church, your conservative in-laws house, or your hyper-opinionated mom's house (although she can't say "you're not wearing that to your dad's funeral?!" anymore because the poor guy finally died!).

Happy sewing!

Friday, March 15, 2013

Toddler Pinafore Tutorial Sewing Instructions

A while back I bought a toddler pinafore to use as a sewing pattern. I could have bought a pattern, but they are expensive and hard to understand in my opinion.

I traced the pinafore to use in the future when I wanted to make more of them. I could have used regular paper for the pattern, but I knew I would be using this unique pinafore pattern so I used a more durable medium...office files. Laugh all you want, but it's what I had and it works perfect. It will last and last as long as I take good care of it!

What I love about it is the fact that it's a simple one piece pattern. If you add a lining, it becomes reversible. I highly suggest one puts a lining in it because it makes it look better. You do see the lining or the reversed side from the back because of the criss cross style. You can get this pinafore pattern in many places online. I haven't found it for free yet. :(

I chose an ever popular owl print for both layers of my pinafore. I then pinned them right sides together....
Both layers took a yard of fabric for me. It will yield a size 1-3 toddler. The wide variance in size is because the pinafore fits loosely...like an apron. One can wear it as a dress, pinafore, an apron (though there are much easier apron patterns out there that take far less fabric to make!)....even a tunic later on as it becomes short but fits elsewhere! I think it would be cute over a onesie or leggings.

The longest "arms" or straps will have buttonholes. The shorter "arms" or straps will have buttons. Use flat buttons NOT shank ones because that would obviously feel more comfortable against the skin....no matter how one wears it.

I chose to bolster the cotton satin fabric with interfacing on the buttonhole part of the straps. I didn't have any of the fancy kind one normally would use, so I used white wool felt....it was what I had on hand and felt doesn't wiggle around, it's sturdy, it washes well, and it's not lumpy, too thick, or ravel. Perfect!

 All I have to do is sew 1/4 inch all around this pinafore. How simple is that?! Cutting it out was a different story though. :/ That's a LOT of cutting!

Here's the end result....I left a two inch gap at the bottom to turn the dress right side out and then closed it up with my sewing machine. Did I mention how stinkin' FABULOUS my machine is???! Oh yea. It embroiders, it quilts (not sure when I will make one though....) and it overlocks the hems....why need an expensive serger when you can get the exact results from a regular machine that overlocks the hems??!

front of one side....yea, I know, I need to iron this!

front of other side....

back of one.....

and back of other....
No scary zippers, no snaps, and I just figured out how to use my buttonhole presser foot.....what a fabulous day!

Monday, March 11, 2013

Wrap Around Onesie Tutorial And FREE Pattern

I FINALLY got my new sewing machine! That's why I haven't written lately. I have been having so much fun with this awesome thing!!! I went with the Singer 7258 Stylist because I do many different things with a sewing machine, so it's capability to embroider, quilt, and regular sew was important. It also has 100 stitches and is fully automatic and computerized. I couldn't afford to get the one that plugs into your computer. I'm glad I didn't get it anyway. I am still overwhelmed a bit with this one! however, it has been relatively easy to learn and get used to.
I finished my grandsonn's romper finally. It turned out so cute....all black corduroy....but short sleeved as he will be born at the end of this month ....Texas is usually a little warmer by that time.

I also made a wrap around onesie for my new shop I will someday open. I want to take care of some family things, finish all of my dental surgeries ( I have another one tomorrow!), and have some inventory to actually put in my shop when that day comes. I am currently having a clearance/shop closing sale at my Etsy store, Far Out Sprouts.

If you want to make the cute onesie below, first download the pattern here.

I used 1/2 a yard of waffle textured jersey knnit and 2 yards of binding. I bought both at fabricfairy.com. They have the best stuff ever!

I'm not the best teacher, but maybe you can follow my train of thought on this one......

Forgive the horrible blur and over exposure on that picture! UGH. I have NO idea what happened! Anyway, I put the slightly shorter front flap marked "inside" on the pattern on the inside and the bigger (has a deep rounded part at the bottom) on the outside or on top of the inside flap. EVERYTHING IS RIGHT SIDES TOGETHER. Sew only the shoulder seams right now.

This is what you should have when you do the shoulder seams

Now add bias tape of your chose or make your own and sew it along the neckline and  around the  edges of the inside and outside flaps.
Don't do anything to the sides or bottom of the onesie yet!

There are many ways to sew on bias tape. Mine always turn out bad until I stumbled upon a nifty idea to sew one side of the bias tape to the raw edge of the fabric and then fold over the bias tape and zig zag the bias tape closed....ziag zaging over the straight seam you originally made in the first step. Here is what I mean...

I am sewing a straight stitch to the bias tape I have just pinned the crap out of  along my desired route of fabric....a lot  of pinning means it won't dance away from you. :)
Here is the finished results of zig zaging the bias tape that i folded over the fabric edhe after stright stitching it. Zig zag stitching looks nice and allows the fabric to stretch and move with an active child.
You will now add bias tape to the crotch part of the main piece of fabric....NOT the two flaps...they are done with bias tape and won't have anymore added.

Here's what you should have now if opening the onesie up and spreading it out. Ignore my 10 yr old's coin collection. :/
Make three or so pieces of fabric to stabilize your future snaps that will hold the flaps to gether. Mine were just oblong-ish shapes of like 2 by 3 inches and I zig zaged around the edges to make it look more finished. Knit doesn't ravel so it doesn't matter what you do. No one will look at the flaps anyway!

one piece goes to the bigger flap....the one with a longer crotch.

two ;pieces go to the smaller or inside flap.
here is what you should have after sewing up the sides and the sleeve sides. DON'T  SEW THE CROTCH  !

 Here is what you will have when you turn everything right side out. Now, iron it and sew in those snaps and you're done!